![]()
![]()

![]()
![]()
You can compose and push SMS campaigns to single or multiple recipients. You can also push silent bulk campaigns.
To create an SMS bulk campaign:
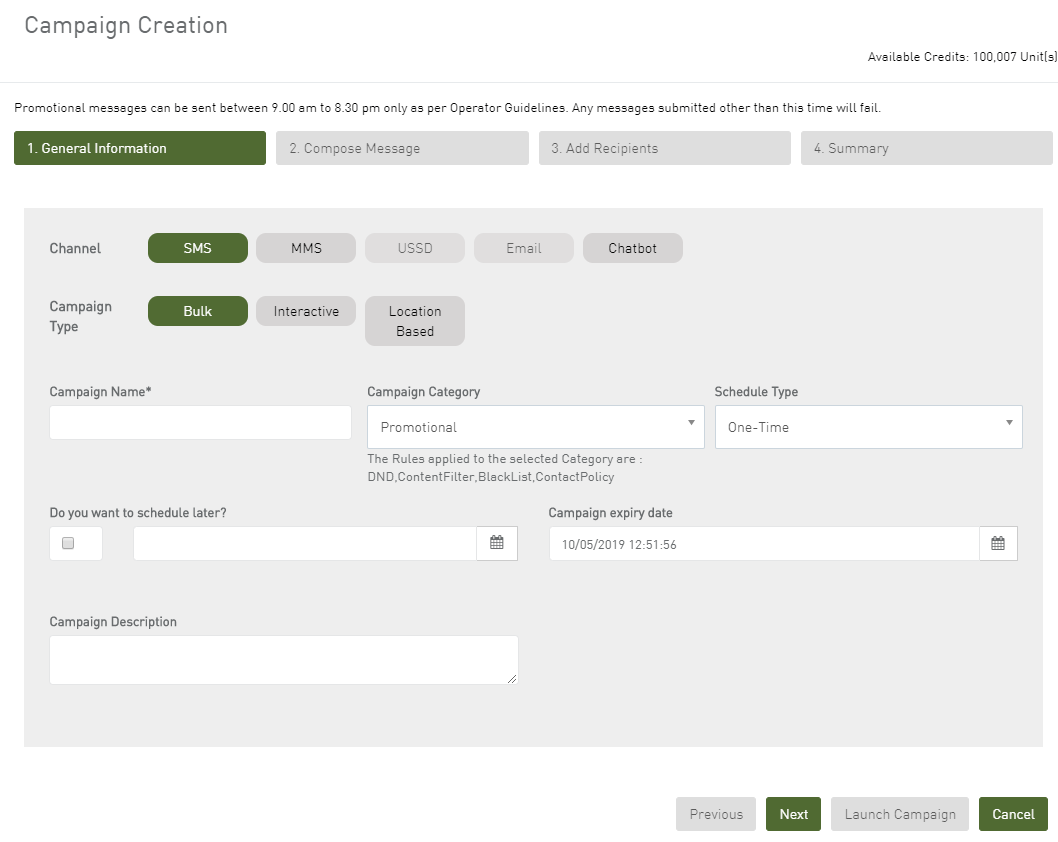
Campaign Management > Launch Campaigns > SMS > Bulk
![]()
Click here to view the field descriptions.
1. In Campaign Name, enter the name of the SMS campaign.
2. Click
 to schedule the campaign
for a later date
to schedule the campaign
for a later date
3. Click
![]() to select the activation
date to schedule the campaign for a later date.
to select the activation
date to schedule the campaign for a later date.
4. Enter the other field values as required.
5. Click Next.
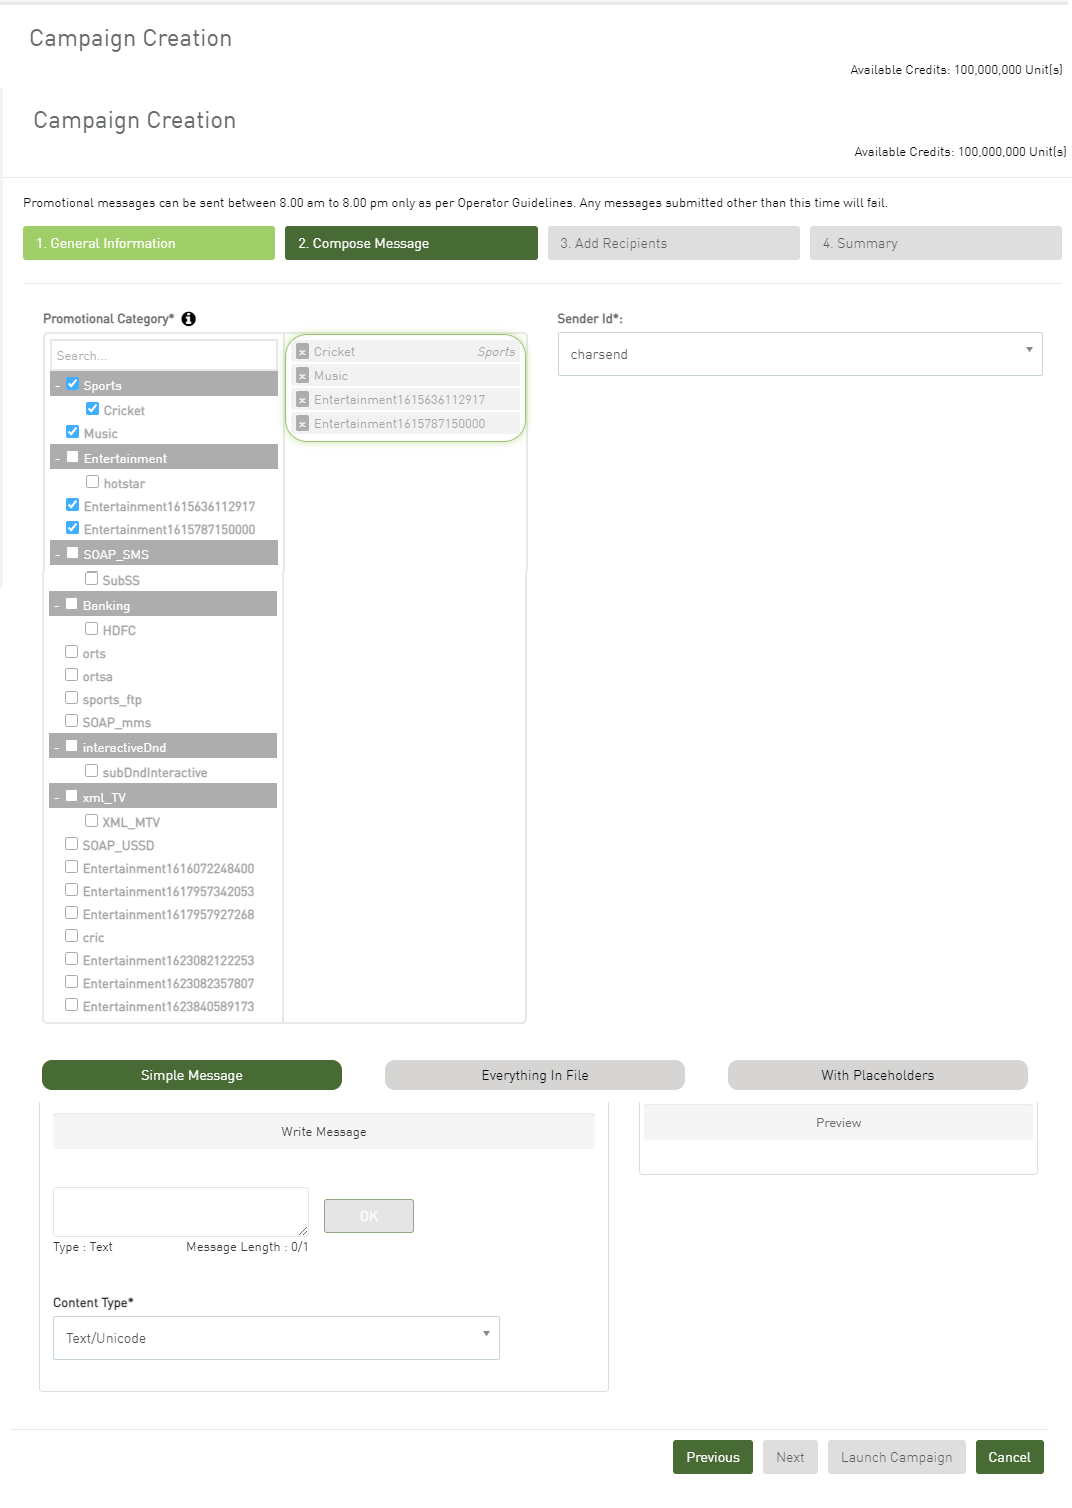
6. From Promotional Category, select the category to which this campaign belongs.
a. From Sender Address, select the ID of the sender.
If the SMP user selects the campaign category as Promotional then promotional sender IDs with AD- prefix are displayed in the Sender Id drop down.
![]()
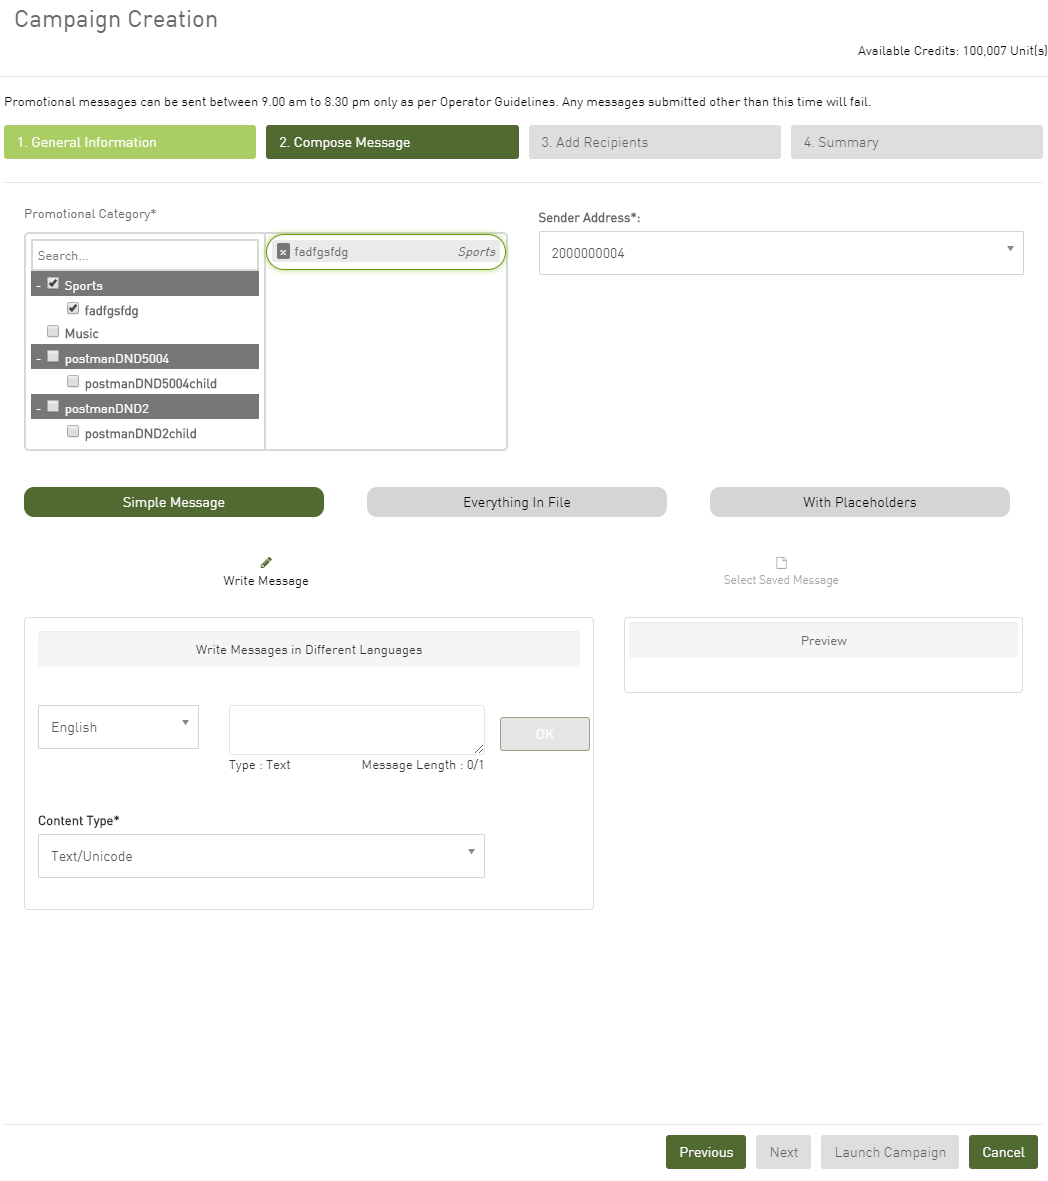
7. From Transactional Category, select the category to which this campaign belongs.
a. From Sender Address, select the ID of the sender.
If the SMP user selects the campaign category as Transactional or Subscription then transactional sender IDs without AD- prefix are displayed in the Sender Id drop down. If the sender Id is configured to a international country the messages are sent to international numbers.
Click here to view the field descriptions.
![]()
Click Simple Message.
Select the language of the message and enter the message to be pushed.
Click OK. The preview of the campaign is displayed.
Click Everything In File.
![]()
Click Upload File.
Upload a file (.txt/.csv) which contains message and respective MSISDNs.
Click Generate Summary. The preview of the campaign is displayed.
Click With Placeholders.
![]()
Enter the placeholder template (Write Message) or select the predefined placeholder template (Select Saved Message).
Click OK.
Click Next. The preview of the campaign is displayed.
8. From Content Type, select the type of content to be pushed.
9. Click Next.
The following Add Recipients screen is displayed if you select the Simple Message option.
![]()
Click Enter Manually to add the recipients manually.
![]()
Or
You can select any of the following options to add recipients:
Distribution Lists: Lists consist of recipient mobile numbers for pushing campaign messages. Lists can be accessed by the CP Users configured under CP Accounts.
Contact Groups: Contact Group consists of multiple contacts groups to categorize the contacts in the system.
Contacts: Contacts consists of recipient mobile numbers.
Enter Manually: Mobile numbers of the recipients to be entered manually in the given text box.
Upload File: File containing the list of recipient mobile numbers to whom the messages will be pushed.
Segmentation Lists: Segment based on the subscriber profile information. Example: AGE, GENDER, PROVINCE, CITY, and many other parameters.
Note: These are pre-configured lists in the system.
Click Add.
The recipients mobile numbers are added in the MSISDN lists.
The following Add Recipients screen is displayed if you select the With Placeholder option.
![]()
Upload a file (.txt/.csv), which contains placeholder values and respective MSISDNs. Enter correct or valid placeholder values as in the placeholder template.
Click Generate Summary after uploading the file. A summary gives the total number of valid and invalid subscribers.
Note: Invalid subscribers are the subscribers whose MSISDNs are invalid, that is, the MSISDN does not meet the mobile number format defined or has regular expressions.
The following Add Recipients screen is displayed if you select the Everything In File option.
![]()
10. Enter the recipients as per the requirement.
11. Click Next.
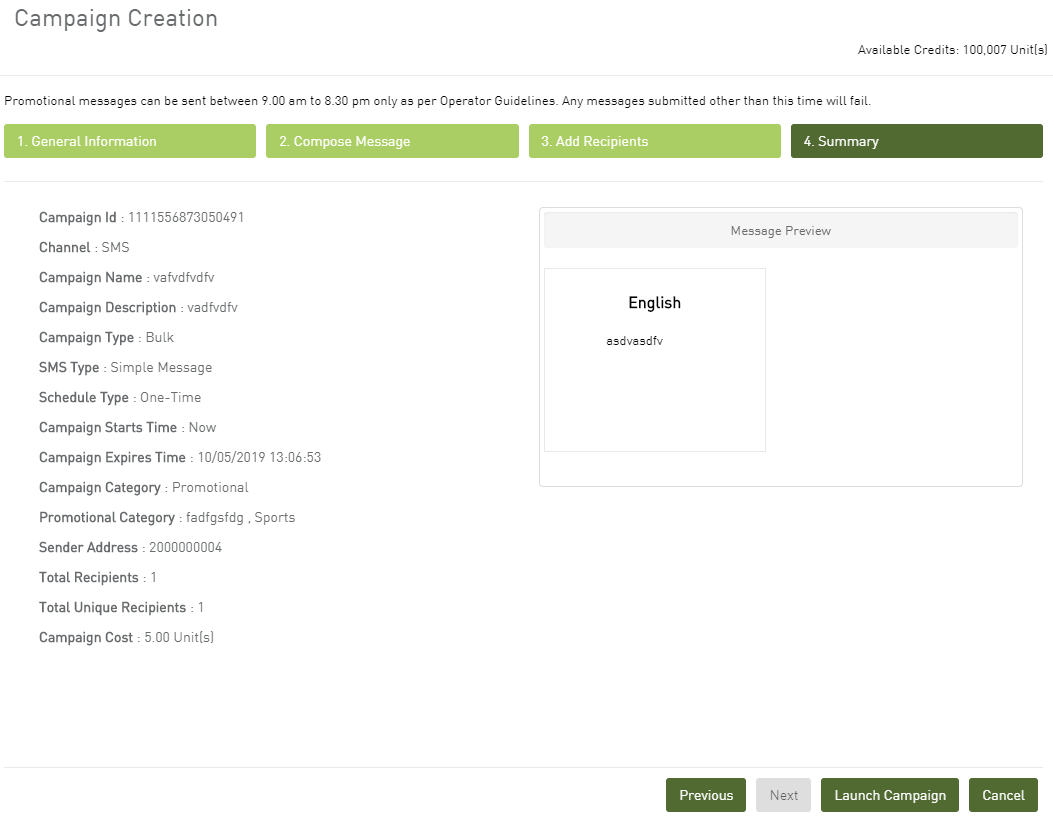
The summary of the campaign is displayed.
![]()
12. From Delivery Report, enable or disable the message delivery status.
13. Click Launch Campaign to launch the campaign. This screen displays the campaign ID of the sent message. The campaign ID is a unique ID assigned by SMP to each campaign submitted. The reports can be generated based on campaign IDs.
![]()
The campaign is added to the campaign list.